
Now 10% off all Ergolash lashing straps save now! Voucher code: ergo10 | Valid until 31.05.2025
The vehicle is ready. The goods are packed and ready for loading. But what type of lashing do I use to secure my load on the truck? How many belts do I need and in which directions can the goods move?
What sounds simple requires specialist knowledge in the fields of physics, dynamics and also knowledge of the various options for lashing cargo.
Below we show you the most common types of lashing and what is important.
In principle, these can be divided into four areas: direct lashing, diagonal lashing, diagonal lashing and sling lashing . But let’s take a closer look at them.


This occurs relatively frequently and only requires rather low pre-tensioning forces (in contrast to tie-down lashing). The actual load only occurs during heavy braking, cornering and when starting off.
The most important point when lashing diagonally is the correct angle of the lashing equipment. These must not be too steep, as otherwise the forces generated when cornering or braking/starting would be too great. One lashing always secures one of the four corners of the load.
A lashing calculator is a reliable aid here. It reliably provides you with both the correct angles and the required number (at least four, but often more) of lashings.
The lashing equipment is attached diagonally, but not necessarily crosswise. There are various ways of attaching a diagonal lashing.
This has the advantage for the user that the lashing angle (lashing equipment at an angle to the edge of the loading floor) can be influenced more favorably.
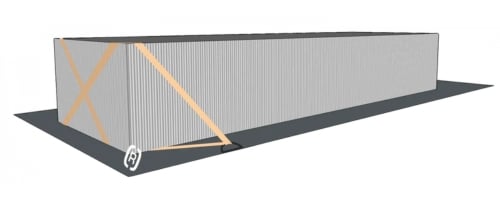


As you can see, the lashing angles vary depending on how the lashing equipment is positioned. The securing force depends on the following factors:

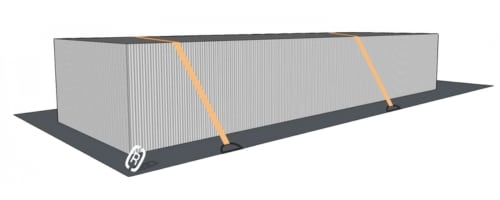
This type of load securing is frequently used in practice. The ratchet strap is placed over the fabric (overstretching) and pressed onto the vehicle floor during tensioning. The friction between the load and the vehicle floor creates a frictional connection that holds the goods in place.
Naturally, this type of load securing often requires a higher number of lashings etc. The shipper can reduce the number of these by using friction-enhancing intermediate layers, e.g. anti-slip mats or anti-slip paper.
If these anti-slip devices are not used, 0.8 times the load weight acts in the direction of the driver during emergency braking and 0.5 times the load weight acts towards the outside of the bend when cornering. With a load weight of 5,000 kg, for example, this would be 4,000 kg or approx. 4,000 daN to the front. When cornering, this would correspond to 2,500 kg, or approx. 2,500 daN.
Professional tip: When buying anti-slip mats, pay attention to VDI Guideline 2700 Sheet 15. Only if you make sure that the anti-slip agents comply with this standard when purchasing them can you assume that you can apply a friction coefficient of 0.6. In addition to the general durability, the binder content of a “cheap” rubber anti-slip mat may be too low. This can cause individual rubber granules to come loose and even cause the goods to accelerate during braking.
This is a type of direct lashing. The lashing equipment is placed as a sling in front of, behind or to the side of the load and attached to the lashing points on the load floor.
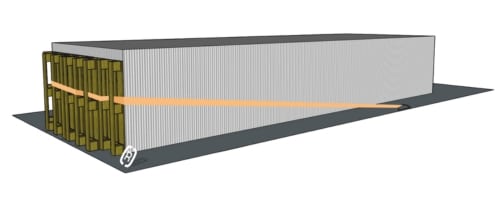
You can create rear load securing relatively easily with a head lashing. Or if, for example, no positive locking to the end wall could be achieved due to load distribution, an artificial end wall would be possible. Upright pallets are placed with the “smooth” side against the goods. This ensures maximum power transmission to the load. The substructure of the pallets also provides a holding function for the lashing strap when it is passed through there.
Here too, as with all types of lashing, the correct angle of the lashing strap is very important. In the case of a head flashing, this should be less than 45° in order to achieve a high positive-locking portion of the securing force. The center of gravity of the goods must always be below the lashing equipment.
You can find more information about applying a head flashing in our blog post episode 6: Bay or head flashing – what is it?
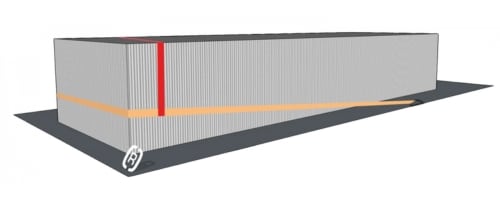
Alternatively, a head flashing can also be created with a retaining strap (red in the picture) if, for example, no pallet is available.
The holding strap takes over the function of holding up the pallet in the previous example. The horizontal ratchet strap is guided through the holding belt (which has a loop at both ends) and past the front of the goods.
We also recommend using a lashing calculator to determine the correct angle. Head flashing can take place in or against the direction of travel, or only in one of the two longitudinal directions of the vehicle. Lateral load securing must be carried out separately here.

If the load is suitable for this, e.g. for block goods, a head-crosslashing can also be attached.
To do this, the suspended ratchet strap is guided upwards over the fabric and back under the fabric on the front side to the other side. With the second ratchet strap is done in the same way.
This creates a frontal cross lashing with high retention force. In order to obtain the required values in accordance with the loading plan, this variant can be supplemented with additional tie-down lashing over the goods.
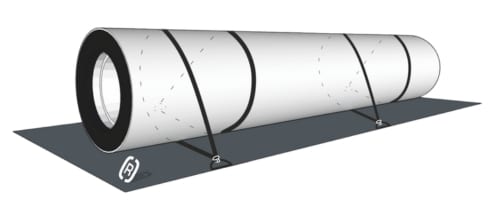
Book lashing is also explained in more detail in our blog post episode 6, so here is just the most important information. In principle, sling lashing serves here as a kind of “dropside replacement”, as no form-fit loading can be implemented. However, a strapping lashing can only secure the goods laterally. Securing in the longitudinal direction of the vehicle must be carried out separately, e.g. through a combination with a head lashing.
Like many types of lashing, this variant originally comes from the maritime industry. Loops are placed around the goods and both ends are attached to the vehicle. It is important to attach the loops opposite each other and symmetrically. This is the only way the forces can work against each other and reliably secure the load. At the very least, however, a minimum of 3 slings should be used.
In the direction of travel, the bay lashing is almost ineffective, so it is best to work with a positive fit to prevent slippage.

Bay lashing using lashing straps (applied to two different anchor points)
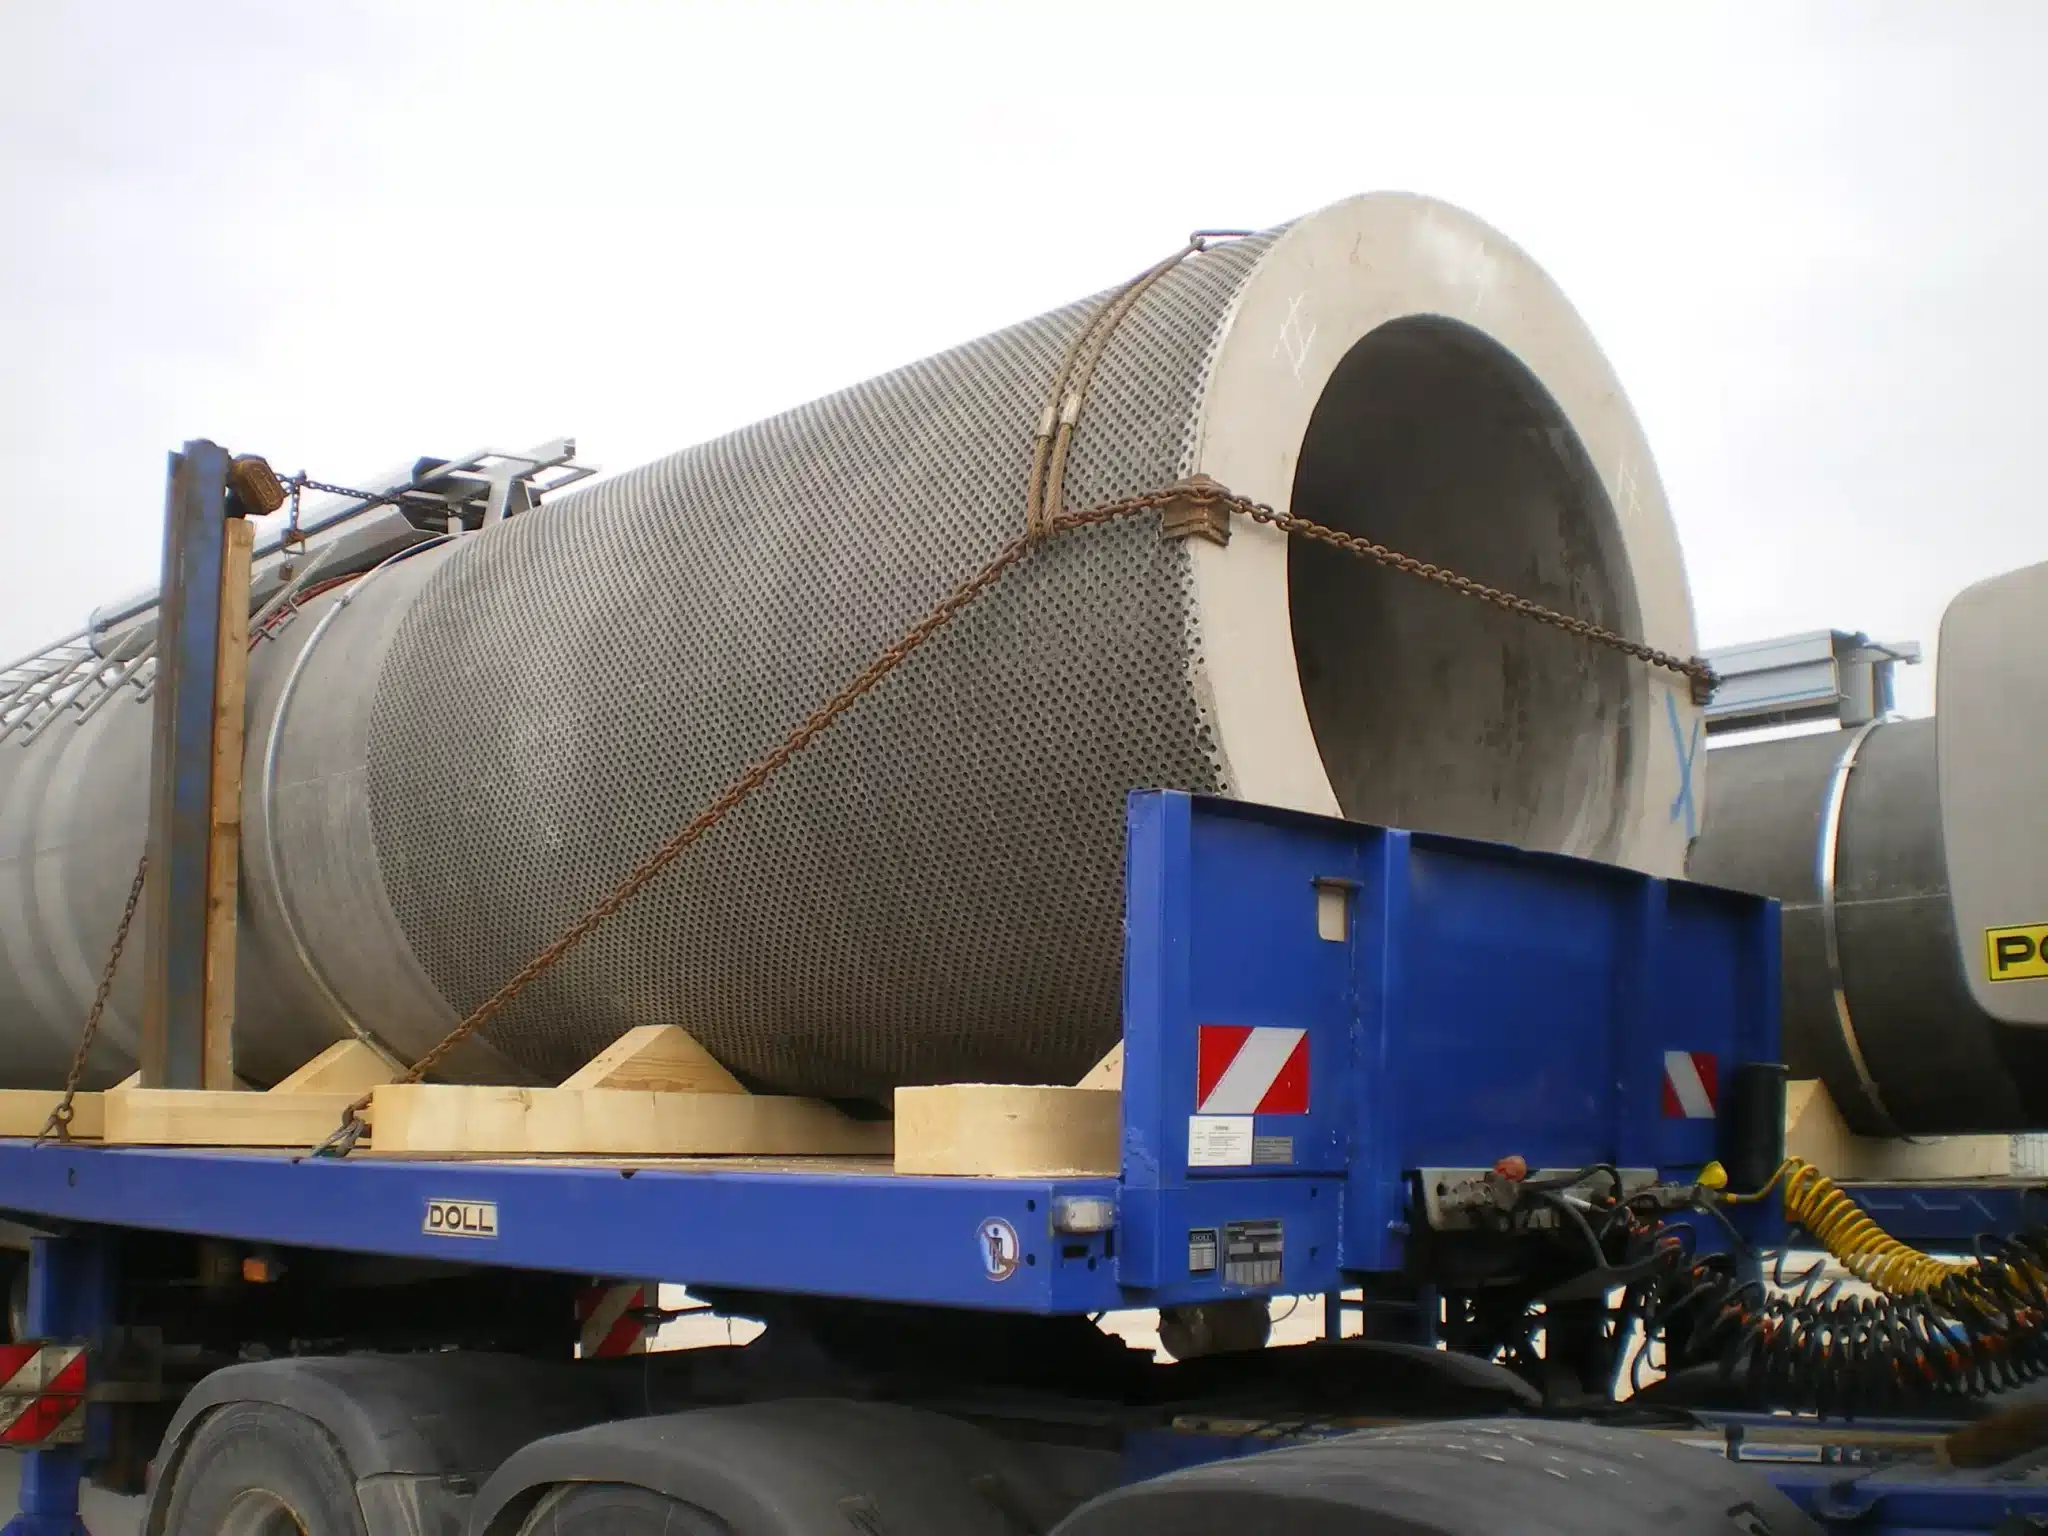
Bay lashing combined with a head lashing made of chains (with retaining strap) in the direction of the vehicle
The label of a DIN lashing strap provides you with information about the pre-tensioning forces and the maximum load weights that can be secured with it. The drawing shows the different effects of specifying the values for direct lashing and head lashing as opposed to tie-down lashing.

When lashing down, the forces are redirected so that we are only talking here about the pre-tensioning forces to be applied by hand.
SHF = Standard Hand Force (The standard hand force that must be applied to tension the ratchet)
STF = Standard Tension Force (This is the standard force that is transferred to the lashing equipment by tensioning)
LC = lashing Capacty (Describes the tensile strength of a lashing strap, i.e. the maximum load capacity of a lashing equipment in a straight pull)
European standard EN 12195-2 regulates what must be printed on a lashing strap label and what should not be printed on it. Nevertheless, mistakes are made time and again, especially with inferior goods from Asia.
On the right you can see an example that with a trained eye can quickly be recognized as a forgery and not conforming to the standard.

Error 1: The label shows the forces to be applied not in daN but in kg. An indication in kilograms has no place on the label, the information must always be given in decaNewtons.
Error 2: The CE logo does not correspond to the official marking logo. The original is half-arched, on the label this is only printed in writing (presumably for China export). Of course, this does not comply with EU CE marking.
TIP: When buying lashing straps, make sure that the correct specifications such as EN 12195-2, CE marking and correct specification in daN are given. This is the only way you can be sure that the lashing equipment delivers what it promises. If you cut corners here, it can quickly become expensive – and not just during an inspection
<< Previous post
Episode 24: Avoiding recourse claims
Next post >>
Episode 26: MSL and LC – abbreviation with meaning

Sigurd Ehringer
✔ VDI-zertifizierter Ausbilder für Ladungssicherung ✔ Fachbuch-Autor ✔ 8 Jahre Projektmanager ✔ 12 Jahre bei der Bundeswehr (Kompaniechef) ✔ 20 Jahre Vertriebserfahrung ✔ seit 1996 Berater/Ausbilder in der Logistik ✔ 44 Jahre Ausbilder/Trainer in verschiedenen Bereichen —> In einer Reihe von Fachbeiträgen aus der Praxis, zu Themen rund um den Container und LKW, erhalten Sie Profiwissen aus erster Hand. Wie sichert man Ladung korrekt und was sind die Grundlagen der Ladungssicherung? Erarbeitet und vorgestellt werden sie von Sigurd Ehringer, Inhaber von SE-LogCon.
Rothschenk assortment
Our customer center has only one goal: to turn your problems into solutions. Whether standard stowage cushions, bestsellers or load securing personally tailored to your needs -. we accompany you consistently from A as in field service to Z as in certification. That is our promise to you, as a leader in our industry.
We attach great importance to professional cargo securing. That is why we have our own production, which ensures reliable operation through modern manufacturing technologies and strict quality control. Thus, we offer our customers a comprehensive and high-quality range of services in the field of transport logistics.
DIN ISO 9001:2015, EMAS and Ecovadis are not foreign words to you? Then it's time to work with the best.
You don't take any risks with us - we have been awarded the Platinum Medal on the EcoVadis sustainability rating platform.
As a load securement company, we are proud to have several certifications that validate our sustainability efforts and our commitment to environmental protection and social responsibility. For you as a purchaser, this means that we demand and promote the implementation of high environmental and social standards both within the company and along the supply chain.
You are currently viewing a placeholder content from Google Maps. To access the actual content, click the button below. Please note that doing so will share data with third-party providers.
More Information