
Lashings are increasingly being used to secure cargo in containers. Their purpose is to direct the acceleration forces via the securing device specifically and completely into the container body.
However, care must be taken to ensure that they are used in such a way that they achieve their maximum efficiency. In practice, mistakes are made time and again.
I would like to describe some of them below and give tips on how to avoid them.
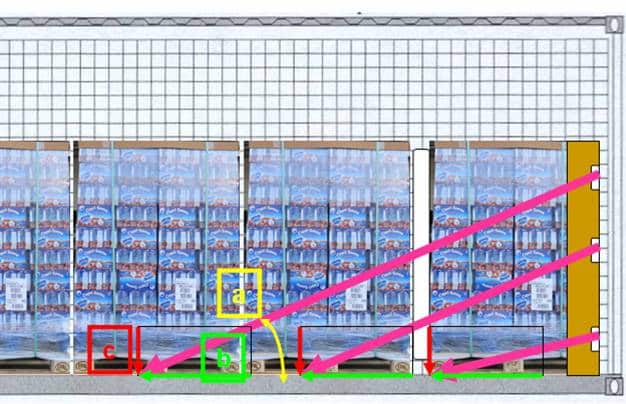
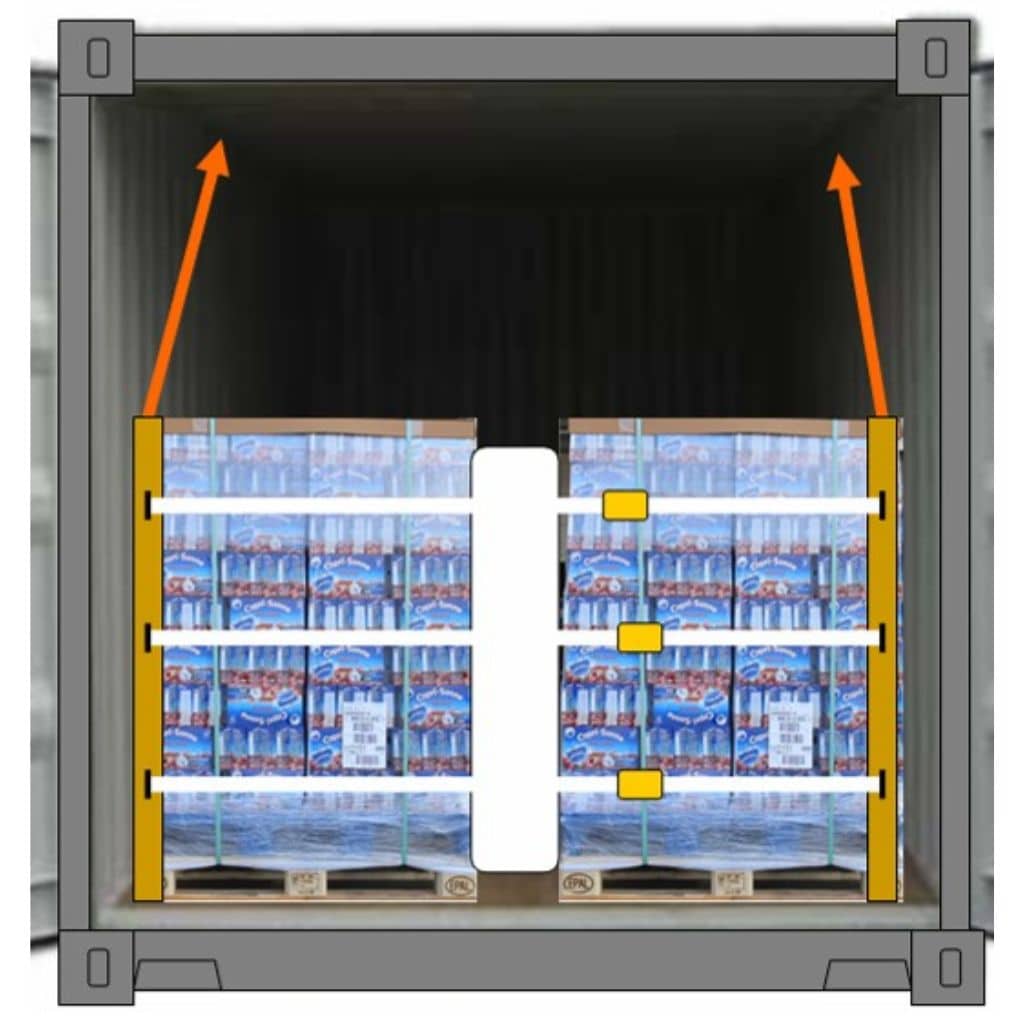
Note 1: Care must be taken to select the lashing angles(a/YELLOW) to the lashing eyes on the floor and ceiling so that the green force component(b/GREEN) parallel to the walls is as large as possible.
This force component secures the load. The red force component(c/ROT) increases the frictional force on the ground, but has a small share in the securing force.

Note 2: The same applies in principle to lashing systems that only use the lashing eyes on the floor.
Here too, the securing forces must be applied to the floor parallel to the container walls in such a way that the green force component(b/GREEN) is greater than the red(c/ROT).
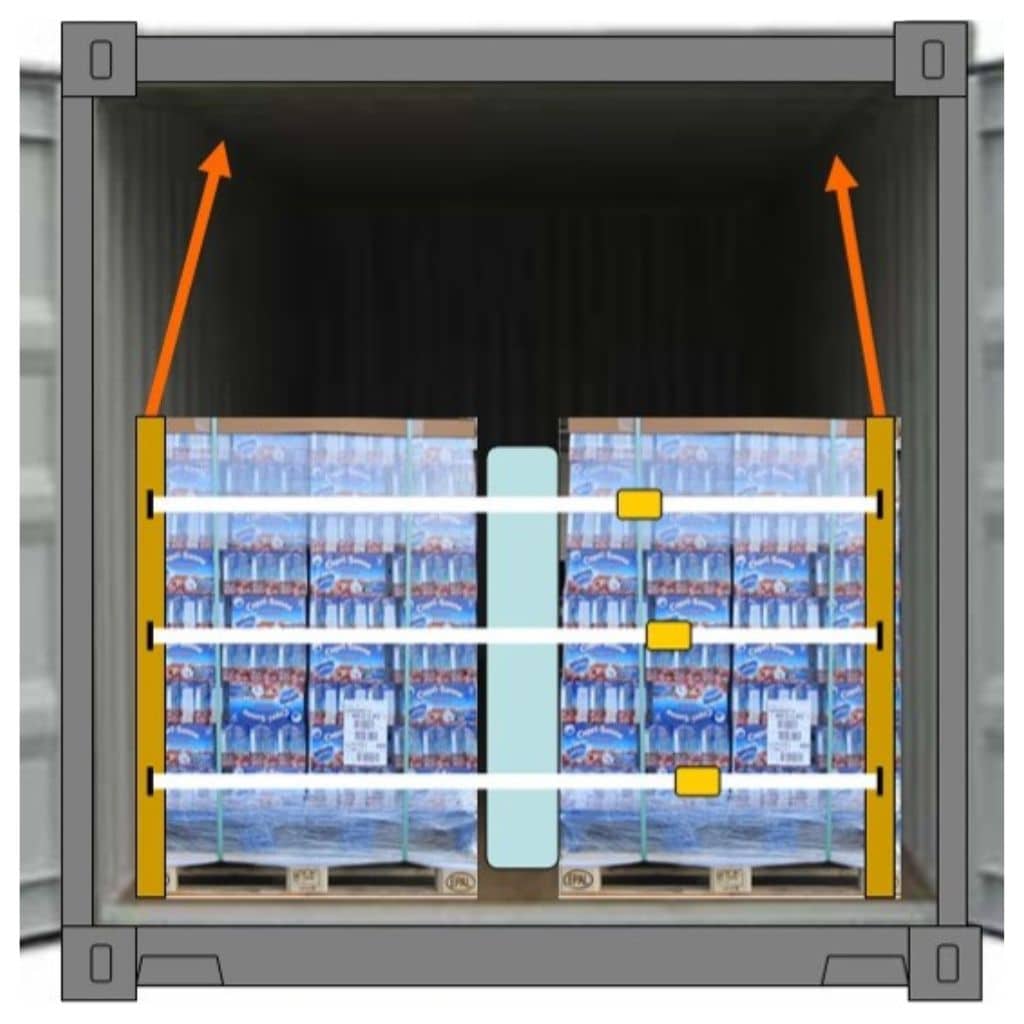
With both variants, it is important that the lashing straps are hooked into the eyelets in good time before the load units prevent access.
A stowage plan is very helpful in these situations. dunnage bag can be used to reduce the distance to the rear door or to distribute the load in the container so that the load distribution plan is adhered to. It can also be useful dunnage bag to reduce the gaps to the sides of the container.
If lashing systems are used at the same time, it is important to ensure that the lashing straps are evenly tensioned.
The following procedure has proven to be practicable.

Step 1: Load the container up to the lashing eyes to which the lashing is to be attached and secure the load.
Then attach the two halves of the lashing system. To do this, thread the cross straps into the standing edge protection and attach them to the container doors with strong magnets.

Step 2: Stow the next load units and blow on the dunnage bag so that it stands in the gap but does not yet exert any strong pressure.
Step 3: Connect and tension the lashing straps. Check that the lashing straps willingly follow the tensioning force and tighten, but are not jammed by the load.
The locking clamps should not be in the area of the stowage cushion but next to it on the load so that the tensioning device can be used correctly and does not tip away.
Step 4: Now finish filling the dunnage bag fill so that there is an internal pressure of approx. 0.1-0.2 bar.
The load will move slightly as a result of the pressure, causing the tension in the lashing straps to increase slightly, thus achieving the required securing force.
This procedure requires some practice, but then results in a load securing system that complies with the regulations and, if used correctly, passes the checks without any complaints.
Of course, this also reduces transport damage. Appropriate photo documentation rounds off the procedure.
Another episode of the LaSi blog will go into this in more detail.
Yours, Sigurd Ehringer
<< Previous post
Episode 15: How does a twistlock work?
Next post >>
Episode 16: Lashings and their application


You are currently viewing a placeholder content from Google Maps. To access the actual content, click the button below. Please note that doing so will share data with third-party providers.
More Information